Showing posts with label Homeschooling. Show all posts

Wednesday, February 9, 2011

A Social Studies Project+ Just a WEE Bit Of Snow


Well, it's still winter.  Wiarton Willie says it will be an early spring, but I doubt it.
We spent one day at  Grandma and Grandpa's, where Grandpa had piled all the snow into sledding hills and snow forts. Grandpa had also been trimming back the old willow tree in the yard in preparation for it's quick spring growth, and the children were happy to help pile the sticks and brush.  So as a bit of reward, grandpa built them a willow fort in the shape of a First Nations Teepee. It had no covering but it sure was fun to play in. It had a snow platform with steps cut out of the sow to climb up to it.


It was a fun day, and it helped a little with the understanding of our Canadian social studies program. We have been watching Billy Connollys North West Passage (best known as "McSquizzy" in Open Season) documentary on Netflix. As we watch, the children follow his progress on maps they have labeled and colored themselves. It has been wonderful for them to see the people that live in our country, and hear the history and see how it influences the present.The documentary discovers the past and present of our eastern Islands, northern country and BC, and all 4 episodes have been a joy to watch.

 Being in the most extreme North of our country, he visits a number of Inuit villages.  Some are still traditional villages with a gentle touch of the modern world, and some have been kicked hard in the teeth by the western influences.  In Episode 2, the children felt a small connection and a glimpse of understanding about our first nations people, having been a big part of the work it took to create their wood stick fort.  Their favorite part was the throat singing demonstration. Littlest Dude (who's 4) even gave it a try after watching that part of the documentary! Their "Eww Gross!" moment wasn't when they skinned a seal, but when the Inuit children ate some raw.

*A quick note, there is a occasional bit of swearing in it, as Billy's  Scottish humor jumps in occasionally, and the occasional drinking scene. But drink is a reality in our country. And as an abstainer I think it's fair for our children to realize that it is a choice for me and my parents and our friends not to participate in that part of our culture. And I  explained as such to them when we see drinking in media or in public.

Monday, January 3, 2011

HOMESCHOOL RESOURCES: Composition and Eng Lit Ideas

Ok, I'm trying out Squidoo.  Stumbled on it looking to make a book list for teaching the children, and it seems to have positive possibilities for me.
So here it is, my Classic Book List for Homeschoolers Grade 3-6. Hope it's helpful!

Wednesday, November 17, 2010

Homeschool Resources

Finances are tighter, but the schooling must continue on without a break.  I have made a few changes to our curriculum to accommodate our budget and to keep the kids progressing in their grade level.

Two free resources I have recently discovered are:

1.  A  free Homeschool Tracker, which generates lesson plans, report cards, accumulative grading and resource lists. It downloads right to your computer and has an inexpensive upgrade that would benefit high school level students and parents. 

2. The National Gallery of Canada CyberMuse, with artist related materials for ALL ages.  A great way for those of us "in the boonies" to see and appreciate art, past and present in a fun way. At our local Homeschool group we have had a wonderful experience this semester learning about art and making our own interpretations of artists such as Picasso and Amedeo Modigliani

Hope these links are helpful!

Wednesday, June 2, 2010

What happens when you leave homeschoolers to their own devices....


You get a puppet show!
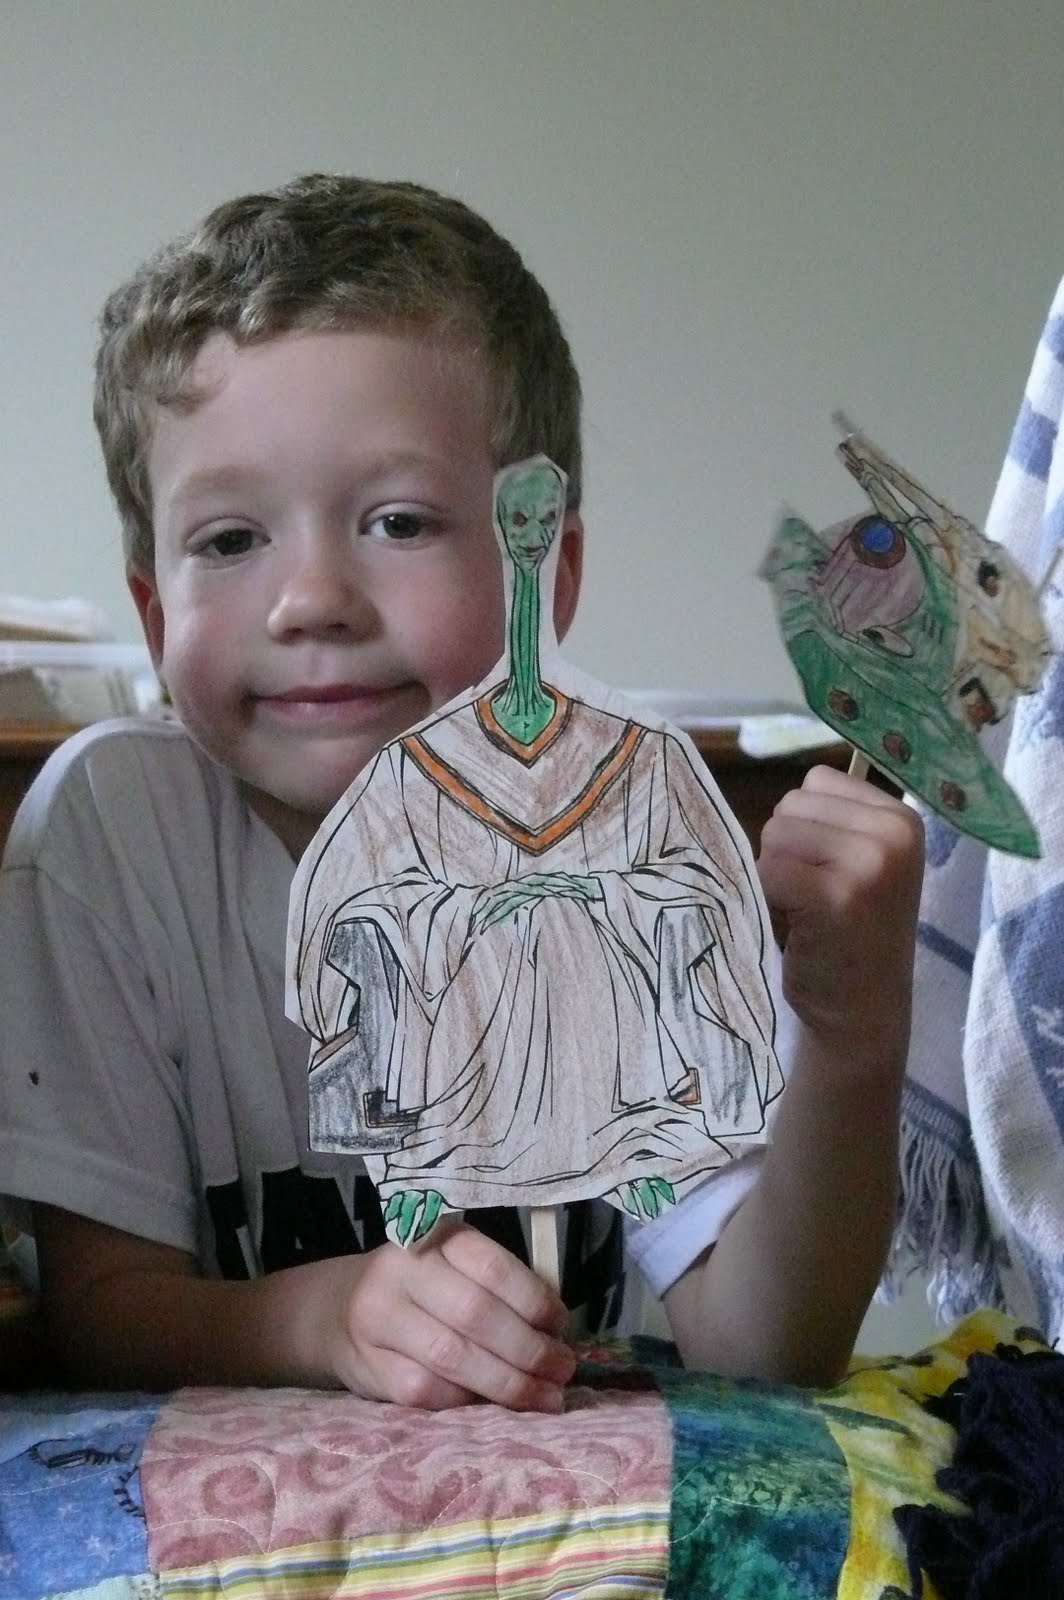
Creative juices were flowing, and the oldest two children colored and cut out coloring book pictures and taped them to craft sticks, all thought up on their own! They covered the kitchen chairs with blankets and moved the big pillows from the studio into the kitchen and put on a show for me. They even made two extra to share with their little brother, a wonderful day!!

Wednesday, May 12, 2010

Spring In the Park

The sun has finally come back out so we could stay out to play.  And look at these wonderful treasures we found in the park today!


Wednesday, April 7, 2010

Bookmark this Page!

I found this wonderful resource for home homeschoolers, or all parents and childcare givers! Come see illustrator  Jan Brett's website, full of activities and printables, coloring pages and games all with nature themes. I am excited to print some of these off.  With all the packing I have been doing, the children are looking for ways to occupy themselves when their math pages are done.  I hope you enjoy these too!

Tuesday, March 30, 2010

"It's Spring!" Table pond

I am packing, and sorting and tossing and packing more boxes.  I am moving to the other side of town in 3 weeks.  We are all very excited about the move, and the children are active participants in the tossing and sorting process. My oldest son is very excited about simplifying life and removing clutter and excess toys. But with so many little helpers, sometimes I need a break! So Grandma and Grandpa have been great helpers, coming and keeping them busy and taking them out on excursions. 
Today they spent an hour at the library together, and then came back to the house for a bike ride around the block.  They stopped often and picked up many spring treasures to fill their pockets.  I was presented with a large handful of Spring gifts when they returned.
So we put them all together with a few added pieces from their shell collection and placed them in a pan of shallow water to keep the crocuses  fresh. The two oldest then  had fun blowing bubbles into the water. It's a beautiful center piece! I wish I could get outside more to enjoy these sunny days, but I didn't mind them bringing a bit of it in for me to enjoy later. :o)

Saturday, February 27, 2010

DD's FIRST Ever Completed knitting project and sewing project together!

DD is so proud, and with every right to be! She knitted her first square, with very little help from me. It is about 5"x 5" and has become a small pot holder (she can't wait to add it to the linen drawer). She even chose and sewed on the fabric by hand with very little help. I am so proud of her.  She is also the photographer of her project, and we have posted it as a finished project on Ravelry Olympics. Way to go! She is already talking about making it's matched mate.


 Pattern:
In case you are interested in making one too, it was made with worsted weight yarn and 6 mm needles.
Cast on 18 stitches. Knit all rows until  square. (aprox 20 rows) Bind off. Iron out on low heat to block

Fabric back:
Then we sewed on a square of fabric. The fabric was cut the same size as the finished square. We ironed the edges under on the fabric and did a blind stitch to sew it onto the knitting. DD also added a "flower" to the center. with two pieces of yarn sewn through all layers and tied into a knot. We cut the ends short and frayed them.

Thursday, December 10, 2009

What does a homeschooler do on a Snow day ?


Have recess outside like any other day!  It's not snowing ice, so we went outside to play in the snow.  We walked down to the river for some untouched open space to make snow angels.  The snow is too powdery for snowmen, but great for rolling down hills and tromping through.


Saturday, December 5, 2009

Nature Play Mat.


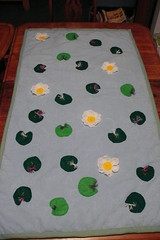
I have a hard fast rule that I won't spend more than $10 out of pocket on a friends birthday gift.  DD has a dear, sweet friends Birthday to go to tomorrow and we just finished the gift.  I SWEAR I only spent $10....I just happened to add to it with some busy sewing fingers and my scrap bag and supplies on hand!

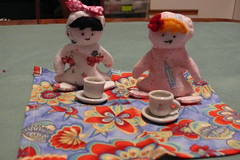
I made two more of my  little travel dolls, a picnic blanket and a play mat from discounted fabric at Walmart
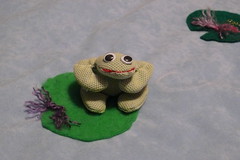
:o( sadly, we too are loosing our fabric department ) and purchased a small set of doll house dishes and a draw string bag at the Dollar Store.  I also made a tiny frog for friends little brother to play along with. The joy of this mat, is that it is also a tied blanket quilt with batting in it, and a game!
(DD doesn't know it, but she's getting one of these for Christmas! )


When I can figure out a better way to link PDF's I intend to post all these as  patterns.  But for now, I hope you find it an inspiration in these pictures!

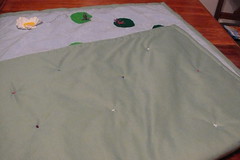
I purchased 1 m of green and 0.8m of blue soft suede velvet and 1 m of quilt batting.

I trimmed 3 inches off of the width of the blue fabric and cut the batting to fit.  I layed down the green and then the batting and then the blue and cut the green  2 inches larger all around than the blue to become the binding.

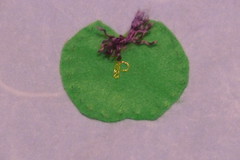
I had a handful of polyester felt squares and gold embroidery thread on hand.  The Flowers are silk flowers removed from the plastic stems and a yellow circle of felt was sewn into each one. Each lily pad and flower has a letter of the alphabet embroidered in the center, (The flowers are the vowels).  I sewed them onto the blue and then I folded the green up double over the blue and pinned into place. I sewd it by hand onto the blue and went around a second time, hand quilting through all layers.

Each lily pad used two strands of yarn to tie the quilt for the quilting. I frayed them to make them look like flowers.n On the back, they look like little "Forget- me- nots" where the dolls can have a picnic together on their picnic blanket


Nature Play Mat/ Blanket

Enjoy a picnic with your dolls on one side and a swim in the lake on the other.  Or wrap it around tight to keep warm on a cold day.  But this is not only a fun play mat and a blanket, but it is a game as well! On the pond, you will see each lily pad has a letter of the Alphabet.  The set of dolls or frogs become your playing pieces and the lily pads and flowers become your squares.


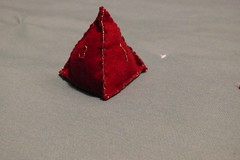
How to use the triangle die

Roll the triangle dice and then pick it up from the point on the top. Tip it over and look at the number that is on the flat bottom and that is the number of spaces you jump.

Games to Play

Depending how old you are, you can play the alphabet game in so many ways.

If you are just learning your lettersroll the die and jump the number of squares. Name the letter you land on correctly! If you don’t name it correctly the first time, you miss a turn.

If you are learning your letter soundsroll the die and jump the number of squares. Name the letter and it’s sound.
 For example:  The Letter  (S) says “sssss”.
If you are wrong, you will miss a turn though. And remember, if you land on a vowel, it has two sounds.  If you get both sounds right you may take a second turn!

If you are reading, roll the die and jump the number of squares.  Name a word that starts with that letter. If you are spelling, spell that word correctly. If you are wrong you miss a turn. At your next turn, spell the word correctly before you move the dice to move on.

The first person in any game to reach the letter “Z” wins the game!


 Beanbag Toss Game


Decide how many tosses each person gets. Toss a doll, and which ever letter the doll lands on, follow the directions in one of the games above minus the die.
Make a point system if you wish:

1 point if you land in water but name a letter close by and follow directions,
2 points for landing on a lily pad and following directions
3 points for landing on a flower and following directions

Keep score on a chalkboard or paper, and at the end of the tosses, add up the score to see who has the most points

Cleaning Instructions.

Dolls and Frogs are made of Flannel and filled with rice. Wash surface with a damp cloth if needed

Mat/ Blanket is made of plush fabrics and should be surface wiped with a damp cloth, or immersed in a tub of luke-warm water and a mild detergent and hung to dry to be freshened. Do not iron.


Friday, December 4, 2009

Simple Play

Here is a repeat of my article for Novembers Frontier Gazette that I thought was worth saying over here as well!

Simple Play
The Christmas fliers have been out in abundance over the last two weeks, full of talking toys, computers and remote controlled cars. Even the doll houses have lights that works and sound cards that make the family talk! Wii and it's games of virtual imagination are big on the scene and what toddler wouldn't like a tractor with flashing lights and real motor sounds?

But what I long for as a mom is a house with home grown imagination and occasional moments of piece and quiet!
Mary and Laura had very simple play toys, made from the natural resources around them or toys that imitated adult responsibilities.

Here is a little list of toys and games that I find quiet, educational and fun for my children.

Wooden train set - we have a battery powered plastic set, but for children under 5, it is difficult to put together, trains crash as they run at different speeds depending on the battery power, and the pieces break when a parent accidentally steps on one hidden under the laundry.

Our wooden set though.....fits perfectly with any building block set, can be cheap or expensive (Thomas verses store brand) and can be put together in any order by any set of cute chubby fingers that is willing to try!
I always enjoy hearing the gentle "chugg chugg whoooo" from my littlest family member

Cloth Dolls - I get so tired of dressing Barbie for the umpteenth time, because her limbs are so stiff for DD to get her dressed. Rag dolls, Waldorf inspires dolls or cloth and wire dolls such as doll house dolls or the Pony club or Only hearts are "girl shape" inspired and easy for young fingers to dress on their own. One rag doll can become a baby, a sister or a best friend at play time, and can be as much fun as any barbie if given with a generous wardrobe. (Oh!! Look at this link!!)

Books - The window to the imagination, almost any kind will do! Finding books that are age appropriate and easy to read for the child is a good idea. But also having books that you can read as a family can inspire great moments together. Offer to read a new book to a child in your life!

Paper, Ribbons, Scissors and Glue- My childrens favorite Holiday gift is when Uncle B raids the dollar store paper and craft department. I personally avoid paint and markers, but I have no issues scrubbing up glue off my table! I have had some very interesting pictures, creatures and "items" created at our table from little ones imaginations without prompts or suggestions.

Just Like Mom: (or Dad!) - Let your children help with chores by providing miniatures of your tools, such as little aprons, small squirt bottles with vinegar and water, little dusters and mini cookie cutters. Let them use playdough when you're baking.
I am all for plastic work tools and hard hats as well, so they can be fixers like Dad.

Out door Fun- Today we had our first snow, and there are two snowmen in my yard! The sleds are out and the skates cleaned up, ready for the local rink. In the fall they made pretend camp fires from pruned scrub, pretended to be birds in nests with the leaf piles. And in the summer they spent hours throwing rocks in the lake and building sand castles and motes. And last spring the loved jumping in the puddles and planting and watering seeds in the garden. There is always lot's to do outside, even without buckets of toys. Head outside and explore and see what Mother nature has left for us to play with!

Toy Tip: Let the batteries wear out and don't replace them! If a toy can be "used" without the batteries, leave them out and let the children start using their own imaginations again.

Wednesday, November 11, 2009

"I'll teach my child 100 words....."

There's a book I love reading to the children called "I'll teach my dog 100 words" It's a fun book to read, but it does make me think about our responsability as parents to our children.  How much easier life sometimes is when our children learn to talk!
You will see a new sidebar link, for a site called Pawz for Words. It is our new "School" project! We have been learning ASL as our second language componant, and I have seen so many wonderful things come from it.


So here's our plan. Over the remaining school year we plan to learn, and post 100 ASL words to this site in our dictionary. DD wants to practice photography so this is a great chance for her to do so. And the boys are excited about being a part of the "cast" in our video clips!

We have named our ASL puppet Leopawz, and he is the sites mascot and official hand signer!
The site has a Video/Photo dictionary, Links to resources, helpful hints for learning and a blog where I intend to post games and activities, kids crafts and new words once a week. We even hope to post a few Sunday school songs  and Awana Cubbie bible verses to the dictionary as well!

So if you have ever had interest in teaching a baby, toddler, preschooler or school aged child sign, I believe this will be a great place to start! Pawz For Words

(We plan by Sunday night to post the entire alphabet and babies first 5 words into the dictionary.)

Saturday, November 7, 2009

ASL /Homeschool Puppet


I was looking up puppets for a Little House project and I spent some time admiring professional puppets.  They look like so much fun! We have a few at home that we play with, and they are great for story telling and role playing. And as I was web browsing I saw some puppets that were two handed-one for the mouth movements and the other fit into a shirt sleeve that was on the body of the puppet and into a gloved hand. It really helps to animate the the puppet.
So my gears started working and with the puppets I had seen, including a puppet on Dr Wonders Workshop, and the desire to add a new activity to our ASL learning I came up with Paws. You don't need a working mouth for an ASL puppet, but two working hands!


He is an over sized 20" stuffed animal that I bought at the thrift store, a size 6X boys long sleeve jersey shirt and a pair of fleece gloves. (You could use stretchy gloves from the dollar store as well) All those supplies cost me a whopping $3!

Here are the directions....

Materials
1 large cuddly stuffed animal of choice (make sure there is a forehead and a mouth area and a chin area on the head, sounds crazy, but trust me! Round headed animals are the easiest)
1 long sleeved shirt that fits the animal (don't worry about extra long arms or length, just have a pleasant fit around the body and neck. Make sure that you can fit your forearms into the sleeves and your hands past the cuffs.)
1 pair of fleece, nylon or stretch knit gloves. (Thick heavy gloves or chenille gloves don't work because you can't shape signs with your fingers well enough)

Tools Needed
scissors
stitch ripper 
pins

a strong all purpose thread in the color of the shirt and the animal

hand needle
sewing machine

Directions

Prepare the Bear (or other stuffed animal like our lion):Carefully with your stitch ripper, remove the arms of your animal and then with your needle, whip stitch the body closed. (I know, a sad thing to do.  That's why we didn't pick a toy from our own toy boxes) Set aside and pick up the shirt.


 Armholes: Carefully cut the back seam of the shirt arm that runs from the shoulder to the under arm along the seam. Roll and pin the now cut and open area into a hem and sew all around with your sewing machine.
 

Hands: Sew the gloves by hand to the inside cuff of the shirt. Stretch the gloves and cuff with your non sewing hand inside of them as you sew the two together around and along the shirts natural hem. This way you know you have enough stretch to get your hands through


Shortening and lining the shirt: Now here comes the tricky to explain part.... the shirt will probably be way to long for the puppet, but you are going to use the extra length to create a liner so that you don't have stray fur or color popping out of the arm openings as you use your puppet.

- From the shirt bottom, fold the shirt up inside itself until the bottom hem at the side seam reaches the shoulder seam right by the neckline. With your needle and matching thread tack the shoulder/neck seam and bottom hem together. Repeat for second side.


- Lay the shirt flat on a table inside right, and with the bottom hem still tucked up inside,  even up the fold around the bottom and pin all the way around

- Sew around the shirt 1 inch up from the fold edge. This makes the shirt look like it's hemmed.

5. Place the shirt on the puppet. With a needle and thread tack the shirt (at the same place you tacked the shirt at the neck) to the top of  where you whip stitched the arm holes together. This would be the shoulder of the puppet. Do this on both side so that the shirt won't be removed. The remaining tucked up shirt fabric is just left alone, unless you find there is too much bulk, then you could tack it in various discreet places to the puppet.


6. Now have fun! Go to Paws To Tell You or SigningSavvy  to learn some ASL alphabet and favorite words (manners like "please" and "thank-you" are good preschool signs to start with)
Place an arm down each sleeve and place the puppet in your lap. Keep your elbows tight to your side as you move the arms of your puppet. (or it will look like a puppet gone out of control with dislocated joints!)


Friday, June 5, 2009

Laura's log Cabin


We took a day and went over to my parents to borrow grandpa and his tools for this project. (And his supply of cut willow from the tree in the yard!)
It was made by hand tools (Except for a few magically placed drilled holes) and all the children had a turn at the jobs. Today at home we got out the Crayola air dry craft clay and chinked our house and added grass clippings to the roof to "stop the rain" Here is a pictorial of the job!


Building materials


Everything goes better when we all work together...right?!


Getting it straight!

Keeping tabs on the hired hands!

I missed pictures of DD chinking, but here is the finished product!
There are nails placed inside to hang curtains for the window and door, and we made a table and benches from scrap wood and the ax.


Little House in the Big Woods

Besides nature journals we are also following along with a group on Ravelry doing the Little House on the Prairie series. Here's what we did this week

For week One we read Chapter One of Little House in the Big Woods.

Here are our activities we could choose from

1 Go on a nature walk and collect sticks and other natural items (you will want a lot of sticks as they will go with another activity this week!) Done!

2. Use your sticks and natural items that you gathered on your walk (or rolled up brown paper) to create a miniature “Little House” Done!

3. Make Jerky Also suggested was dried apples or fruit leather

4. Make Johnnycakes (HEY, THESE ARE GLUTEN FREE!) using this recipe:
1 cup of cornmeal
1 teaspoon each sugar and salt
Add
1 1/4 cups water, creating a thick batter.
If you want your johnny cake thinner, add one half cup water or milk for a more rich flavor. Drop the batter onto a buttered or greased griddle (Laura used bacon grease!), fry until pale brown, and flip to cook the other side. Serve the johnny cake warm with toppings of choice; butter and maple syrup are common, although jam and savory spreads can be used as well.

5.Make a rag-doll using this pattern. We will be making more things for our dolls (both male and female depending on which doll you want to have), so please make this if you can! Don’t forget to hand-sew and use recycled fabrics if possible. Done!

Friday, May 29, 2009

Nature Day: Hibou Park on Georgian Bay Ontario

We are starting a nature study! It really was too cold for the water today, but what child can resist water! These pictures are actually our second trip today, as they soaked their clothes the first time! So we returned home to change into water wear and to bring warm clothes to stay warm in after. DD and DS1 filled in a page of their new nature journal today as well after supper. We had a wonderful day!

Click to play this Smilebox photobook: Simply Spring 2009
Create your own photobook - Powered by Smilebox
Make a Smilebox photobook

Thursday, March 12, 2009

Artist Thursday

Kristin has been the princess of challenges of late! It's nice having a good reason to keep creative! She has encouraged us to share our painting. Although I dabble in water colors, I'm more of a pen and ink girl. (I embellish pen and ink with water color sometimes)I usually draw sketches for seamstress work, but I have sold a few of my "scribblings" so I guess they aren't bad. Here is one I sent to my Christmas apron swap partner Christian I've never taken pictures of my work before, so this picture is compliments of her blog (Hope you don't mind Christian!?) I made this art work for her specifically, and transferred it onto her apron as an iron on patch. I've already "borrowed" one picture, check out her blog to see the apron if you wish! ;o)

I am currently working on illustrations for a story for my daughter I wrote. We have "Make Your Own Story Night", where the children and I curl up in bed at night in the dark and tell stories to each other and we get to fill in the blanks as they leave a sentence unfinished. We start out, "Once upon a time there was a boy/girl named____________ their favorite (thing/place/ person) was ______________" and then with the filled in information by us they tell the rest of the story. I've embellished it quite a bit, but it was my daughters story I'm drawing pictures for, so I share the credit with her for it! I hope to post the story with pictures sometime in the future. It's called Teeny Tiny Tea Rose for Two. Should be fun!