Showing posts with label Crafts. Show all posts

Wednesday, June 2, 2010

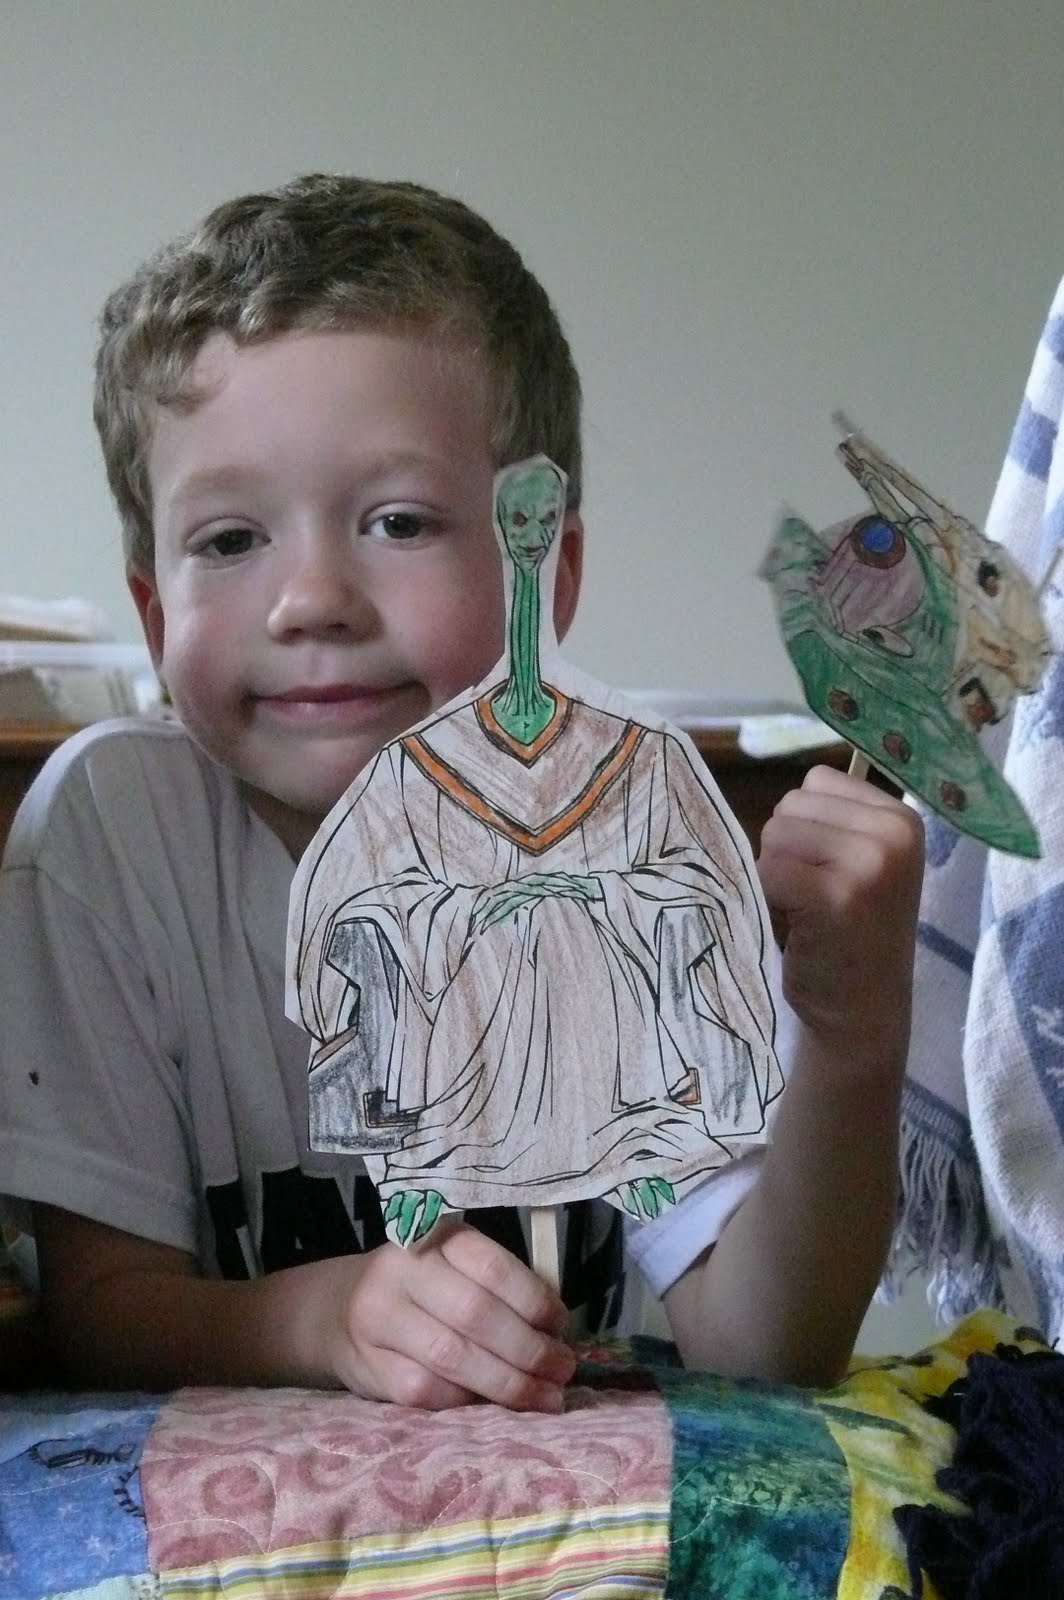
What happens when you leave homeschoolers to their own devices....


You get a puppet show!
Creative juices were flowing, and the oldest two children colored and cut out coloring book pictures and taped them to craft sticks, all thought up on their own! They covered the kitchen chairs with blankets and moved the big pillows from the studio into the kitchen and put on a show for me. They even made two extra to share with their little brother, a wonderful day!!

Wednesday, April 7, 2010

Bookmark this Page!

I found this wonderful resource for home homeschoolers, or all parents and childcare givers! Come see illustrator  Jan Brett's website, full of activities and printables, coloring pages and games all with nature themes. I am excited to print some of these off.  With all the packing I have been doing, the children are looking for ways to occupy themselves when their math pages are done.  I hope you enjoy these too!

Tuesday, March 30, 2010

"It's Spring!" Table pond

I am packing, and sorting and tossing and packing more boxes.  I am moving to the other side of town in 3 weeks.  We are all very excited about the move, and the children are active participants in the tossing and sorting process. My oldest son is very excited about simplifying life and removing clutter and excess toys. But with so many little helpers, sometimes I need a break! So Grandma and Grandpa have been great helpers, coming and keeping them busy and taking them out on excursions. 
Today they spent an hour at the library together, and then came back to the house for a bike ride around the block.  They stopped often and picked up many spring treasures to fill their pockets.  I was presented with a large handful of Spring gifts when they returned.
So we put them all together with a few added pieces from their shell collection and placed them in a pan of shallow water to keep the crocuses  fresh. The two oldest then  had fun blowing bubbles into the water. It's a beautiful center piece! I wish I could get outside more to enjoy these sunny days, but I didn't mind them bringing a bit of it in for me to enjoy later. :o)

Saturday, February 27, 2010

DD's FIRST Ever Completed knitting project and sewing project together!

DD is so proud, and with every right to be! She knitted her first square, with very little help from me. It is about 5"x 5" and has become a small pot holder (she can't wait to add it to the linen drawer). She even chose and sewed on the fabric by hand with very little help. I am so proud of her.  She is also the photographer of her project, and we have posted it as a finished project on Ravelry Olympics. Way to go! She is already talking about making it's matched mate.


 Pattern:
In case you are interested in making one too, it was made with worsted weight yarn and 6 mm needles.
Cast on 18 stitches. Knit all rows until  square. (aprox 20 rows) Bind off. Iron out on low heat to block

Fabric back:
Then we sewed on a square of fabric. The fabric was cut the same size as the finished square. We ironed the edges under on the fabric and did a blind stitch to sew it onto the knitting. DD also added a "flower" to the center. with two pieces of yarn sewn through all layers and tied into a knot. We cut the ends short and frayed them.

Monday, January 4, 2010

Pick Pockets!!

We are always loosing picks in this house, little plastic triangles that float around the house when they should be with husband's guitar or my mandolin.  So for Christmas I crocheted up two thimble holders from this pattern, and they look great...but not "MANLY"  So I designed two more out of jean to suit DH's tastes and one for a friend. Easy to throw in your case, hang from a belt loop, carry in a pocket or clip to a guitar strap!


Monday, December 14, 2009

Gift Tags?!

What do you do when you have the presents wrapped and then realize you have no tags? You feel stupid for one minute and the run to the craft cupboard.

We made our tags from printer  business card stock cut in half length wise and glued on sequins from the bead box to decorate. They turned out very pretty, and under the blinking lights of the Christmas tree they sparkle!

Sunday, December 6, 2009

Ye shall find the babe wrapped in swaddling clothes, lying in a manger.....

Every year I put it on my to do list to create a manger scene safe for little hands. We have a porcelain set under our tree that the children are good about being gentle with, but I would love to have one they can really play with. Well, I still haven't made one yet, but DD and I have enjoyed making this wire wrapped Mary and Joseph and baby together using this technique. We didn't make boots of clay and we used pipe cleaners and embroidery floss. And I couldn't find any plain wood beads, but I love these paper mache beads we found. DD is very proud of them, and at the moment they sit in their own little  stable we found at a thrift store.

I try hard not to focus on the commercialism of Christmas, and I love the idea of celebrating advent, to prepare our hearts to meet with God on a personal level as we celebrate the birth of Christ on December 25. Focus on the Family has a wonderful page about advent with readings and family based activities to do as we prepare for Christmas.
Whether you are a Christian believer or not, make sure you  take some time to ignor the hussel of the season and focus on the gifts of friendship, neighborliness, family and love this season.

Tuesday, June 23, 2009

Magic Kniting Tote?

I think my old/new project tote is magical, everything I set in there gets finished! The sweater from my previous post was in it and I finished in a week, and this crochet hat pattern was carried in it and it's finished too! I have a sweater half done for DD that I keep procrastinating about, I think it belongs in the magic tote next! This hat was made of Lambs Pride wool ,Strawberry Smoothie. (A RAK gift from a Ravelry friend) I'm not usually a huge fan of variegated yarn, but this skein was gorgeous! The hat is from the pattern Jayde Hat, and I added a scallop to the brim at the request of my daughter. I love it!


Friday, June 5, 2009

Laura's log Cabin


We took a day and went over to my parents to borrow grandpa and his tools for this project. (And his supply of cut willow from the tree in the yard!)
It was made by hand tools (Except for a few magically placed drilled holes) and all the children had a turn at the jobs. Today at home we got out the Crayola air dry craft clay and chinked our house and added grass clippings to the roof to "stop the rain" Here is a pictorial of the job!


Building materials


Everything goes better when we all work together...right?!


Getting it straight!

Keeping tabs on the hired hands!

I missed pictures of DD chinking, but here is the finished product!
There are nails placed inside to hang curtains for the window and door, and we made a table and benches from scrap wood and the ax.


Saturday, May 23, 2009

Part One: Make a Dolly!

Whooooosh......That is the sound of time getting away from me! But here is Part one of doll making!

Materials:
Doll Pattern, such as this one
Cotton knit (or lycra knit if you don't care about it being made of all natural fiber), such as you find for bathing suit lining, in your choice of skin tone.
Cotton floss for mouth (and optional eyes)
all purpose sewing thread, skin tone color
Quilting or heavy duty all purpose thread, skin tone color
one neutral colored Bamboo stocking (or nylon if you're not going natural)
Pins
Stuffing ( I use a corn based eco friendly stuffing from Walmart)
Scissors
Wool for hair
Crochet hook
1 long beading needle ( at least 3 inches) or doll needle
Pencil (mechanical works best) or marking chalk pencil


Cutting out your doll
To make a doll like mine, she needs to be made from 2 pieces. The average doll made his way is sewn around the head and left open at the side for stuffing.
BUT for this doll, you will extend the top of the head by 2 inches and sew all the way around, leaving the head open for stuffing

So, cut out your doll and sew her up. Snip the curves carefully but not all the way to the stitches. Turn her inside out and pop put all the seams. Use a large end crochet hook to pop out the thumbs and heals if you need, but be careful not to stretch the fabric too much or you will break the thread (The fabric stretches much more than the thread. Also remember this when you stuff the doll)

Start stuffing the doll, legs first. Pack it as hard or as soft as you desire, but be careful not to strain the seams. Pack up to the top of her leg and stop. Using your quilting thread, cut off a long piece and double it on your needle.


Jointing Your Doll:
I like this style better than plastic joints, as the doll hangs more natural baby like.
Knot the end of the thread 4" up from the bottom. Take on stitch at the top of the leg and then wrap the thread around at least 5 times, cinching the stuffing into the leg. Knot tightly and then pass the thread through to the other side of the leg and cut. thread the 4" tail and pass it through the leg as well and snip.
Repeat this process with the other leg and both arms.

Stuff the body up to the neck and set aside


Thus ends Part one. Part Two will be "Forming the head and face, body sculpting" Part Three will be "WIGS"

Monday, May 4, 2009

Busy Sewers


It's home-ec season in our house. The sun is out, and I have some of my energy back. I've been sewing some items for Etsy, including embroidered pinafore aprons, and the little ones are wanting to follow along. So I have set them to needle and thread, and designed two samplers for DD and DS1. They are doing a remarkable job! I really appreciate the hard work of MyTransfers, and love the vintage images I was able to use for the snow girl sampler. DS1 is still in love with his giraffe bookmark, so we used the same design to make his needle work. I traced the images onto basic cotton that had the raw edges hemmed, and popped into embroidery hoops. And we are using JP Coats cotton embroidery thread to do a basic back stitch. A simple quick start for a project they will enjoy showing off in their rooms, and they learned a skill to boot! (Sorry they aren't ironed, I popped the hoops off for a quick pic!)

Friday, April 10, 2009

Pattern Central Station


It's been a long day and it's barely 4 pm. We had a lovely Good Friday service at the beach church today, where I successfully sang a solo. It's a lengthy drive and the warm sun through the van windows makes for a sleepy family!

DD is so excited about starting up a store on Etsy though, so instead of napping with the boys this afternoon, I spent it drafting patterns at the kitchen table. I have noticed that the average toddler pair of pants has belt loops, but try finding a belt to match! So DD and I have designed two belts, a buckle style and a doo-rag tie on style that even sports a pocket to hold toddlers treasures! In the process of cutting out pratice pieces we discovered that the sash belt when too short makes a very pleasant headband or neck tie scarf! So keep your eyes open for some interesting creations from us

Thursday, April 2, 2009

I'm on ETSY!

I've been missing for a few days, as I have been enjoying some good weather and searching my way through the entire Etsy site to start up a store. SO much to do! I'm still trying to work out shipping costs, but it's going t require a run to the post office to get some straight answers. Very excited, but very worn out! Here's a quick to my shop! CTM

Sunday, March 22, 2009

Life Lessons by a Seamstress


"I will greatly rejoice in the LORD, my soul shall be joyful in my God; for he hath clothed me with the garments of salvation, he hath covered me with the robe of righteousness, as a bridegroom decketh himself with ornaments, and as a bride adorneth herself with her jewels." (Isaiah 61:10)

When you look at a sewing pattern, it's all packaged up neat and tidy. It's perfectly folded and waiting to be used. But is it finished yet? The obvious answer is no, because it has not served it's purpose yet! But is it useful? Yes! The seamstress can use it to make a beautiful dress. But first it must be opened up and taken apart, cut out to the right shapes and size.
A pattern is then set on a solid piece of fabric and pinned on or weighted down. The seamstress carefully cuts around each pattern piece and ends up with a neat pile of material. Is it finished yet? NO! You can't wear a pile of fabric! But is it useful? Yes, to someone who reads the directions provided and takes the fabric to the sewing machine to be manipulated into a beautiful dress!

The seamstress carefully sews it together using their machines and scissors to trim away extra fabric, making all the seams co-operate with the shape of the dress to be. It can be tried on, pinned to size and length and zippers or buttons placed on maybe even embellished with embroidery or lace.
Is it finished yet? It's wearable, it was made to fit. But with all that handling it has creases and wrinkles. It should be ironed with a hot iron to be made crisp and straight. To lay the seams down flat so there are no puckers. But the iron must not be too hot, the seamstress must know her fabric so that she does not burn the fabric and ruin the dress.Is it done yet? It could be. You can wear it with pride, everything looks to be in the right place.

But sometimes the seamstress decides that something is missing, small details need to be added.
And one by one she carefully applies small crystals to the skirt, or the bodice, that makes the dress sparkle when the light touches it. A special detail to make the intended wearer shine above the others around them.
It is done, ready for the big day! The wedding goes on as planned and the day is filled with happy family and friends and a thousand pictures are taken in the garden.


The Garden. Grass. The dress is long, and the grass is damp. And even though we sometimes remember to lift the dress as we walk, all the moving and positioning of the dress during photo's moves the dress carelessly over the grass and stains the underskirts and the hems. Some brides carry white chalk with them to rub over the stains, but it is only a temporary fix. The stains are only masked over for the time being, but they are still there.
Is the dress ruined? If you put no value in the dress, you may say it's ruined and toss it away. But to a bride this was her perfect dress for her perfect day. She will take it to a cleaners and have the stains from that day removed professionally. And then the traditional bride will ask them to box it up carefully for storage, hoping that someday she might have a daughter who she might pass the dress on to.


Now, think of God as our seamstress and our lives as the pattern and fabric.
We come into this life as babies, perfectly folded and sweet. But we are expected to grow, to blossom and experience life. Most of the time we go through life and we are content with where we are . But when strife comes, we question our abilities or our positions or our relationships. And we wonder what we are here for. But God isn't finished with us yet! He still has more to do, situations that will make us grow,instances that will humble us, reasons to show us His love. When we read life's directions from the Bible, we can be more willing to be His fabric and be changed and shaped into something beautiful.
We may feel cut up, pinned or weighted down or feel the heat of hot irons in our life. But that does not mean that God is not in control. Sometimes we put ourselves into those situations because of our free choice to make (bad?) decisions. And sometimes God puts us in those paths, but he knows our fabric and knows how much heat it would take to burn us. God does not desire to ruin us, that is not a part of his plan. He can use those situations to shape us, to iron out order in our lives. He can embellish us, make our lives shine for Him, displaying the light of His Son in this life and allowing us to leave a legacy for our children. But even if we walk faithfully with the Lord, that does not mean our lives will be trouble free. The sinful world will still affect us and even leave stains on us. But when we remain faithful through all these things our reward is with God in Heaven, where we will be perfect in His eyes, "grass stains" and all will be cleaned away, completely gone!


For I know the plans I have for you," declares the LORD, "plans to prosper you and not to harm you, plans to give you hope and a future.
Jeremiah 29:11


c CEJTM 2009

Friday, March 20, 2009

Happy Birthday Jodie!

Best Friend Jodie is having a birthday! Happy Birthday to You! The children made her a couple of little gifts to send to KW with their dad when he went down on a run last week. DS1 wanted to make something stuffed, but time and space, and the fact he isn't able to make something that intricate by himself I started putting out other ideas. Jodie LOVES to read, and has very eclectic tastes in books. So we came up with our own bookmark pattern (if I figure out how to make pdf's to share on blogs I'll post the pattern) of a giraffe. He cut out all the spots himself and between him and his sister, glued it all together. The eyes stick over the top of your book when you place it inside!


And DD made Jodie one of the pin cushions she had wanted to try. She choose out all the materials and sewed the actual flower and stuffed it. Then I embellished the leaves and sewed it all together (for this time! I want her to learn to sew the pieces together herself on the next one!) I'm very proud of the outcome. The ribbon on it actually reads happy birthday in gold sparkles! Both these projects were done in a 2 hr time span, and a lot of fun!

Monday, March 16, 2009

MMmmmm Etsy!


I had a package arrive for me today from LotsOpatterns on Etsy with some crafting magazines. DD wants to make pin cushions featured on the cover, to sell for camp money! I love looking at sewing and craft magazines, and am glad I posses the talent to do a lot of the projects, I just wish I actually had time! I'm also making a couple of hand made items for an up coming wedding gift. I've started making pot holders for a kitchen set, but my DD's idea of pin cushions makes me re think that I should make a vintage style sewing kit? The bride has some traditional skills, so she might enjoy it. The couple are renovating their house, so we intend to include a Home Depot gift card as well.
I also ordered some bags of quilting scraps from Sweets for my Baby, so DD and I can make a yo-yo table runner. We have one ready to sew together, but DD is ready to make more yo-yo's.
I'm a few steps closer to getting an Etsy store going myself. I'm working out a business plan and researching what the quick selling items seem to be. I'm thinking small and kit type items. Maybe even kits for some of my free patterns?
And one last crafting link....I am loving Allie's Craft Blog. She has found some great links to some really great crafting/sewing projects!